FreeRTOS Project Setup
Prerequisites
Section titled “Prerequisites”Overview
Section titled “Overview”This guide provides a step-by-step checklist to set up a Code Composer Studio (CCS) project to use the FreeRTOS real-time operating system on the TI EK-TM4C1294XL LaunchPad. You will create a minimal CCS project, add the FreeRTOS kernel source files, configure the project settings, and verify that FreeRTOS is running correctly with a simple multitasking example.
Library Structure
Section titled “Library Structure”The folder structure of the FreeRTOS kernel source (after unzipping):
- FreeRTOS.h # FreeRTOS kernel header
- FreeRTOSConfig.h # User configuration for your project
- startup_ccs.c # TivaWare startup file (vector table)
DirectoryFreeRTOS # Kernel source
Directoryinclude
- FreeRTOS.h
- task.h
- queue.h
- semphr.h
- … (other headers)
Directoryportable
DirectoryCCS
DirectoryARM_CM4F
- port.c
- portasm.asm
DirectoryMemMang
- heap_4.c
- tasks.c
- queue.c
- list.c
- … (other source files)
Create a CCS Project for EK-TM4C1294XL
Section titled “Create a CCS Project for EK-TM4C1294XL”Follow these steps to set up a minimal project in Code Composer Studio (CCS):
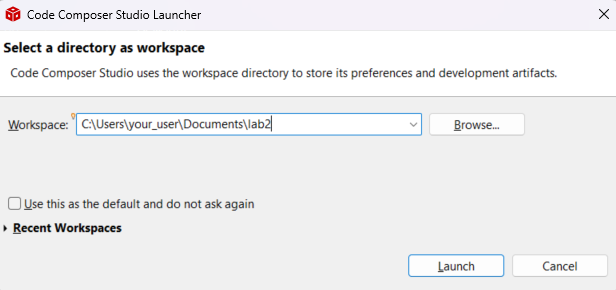
Open CCS and select a folder for a new workspace (we recommend a dedicated workspace).
Create a new CCS project via
File > New > CCS Project.Configure project settings:
- Target:
Tiva C SeriesTM4C1294NCPDT - Connection:
Stellaris In-Circuit Debug Interface - Project name: e.g.,
Lab2_FreeRTOS - Compiler version:
TI v20.2.7.LTSor later - Project templates and examples: select
Empty Project
- Target:
Add FreeRTOS Source Files
Section titled “Add FreeRTOS Source Files”To add FreeRTOS to your project, follow these steps:
Extract the ZIP and place the FreeRTOS kernel folder inside your workspace (e.g.,
workspace/FreeRTOS-Kernel).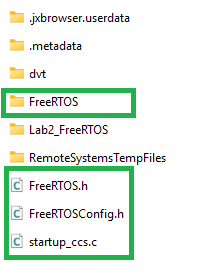
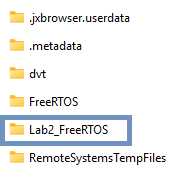
Copy the following files into your project folder (e.g., into
Lab2_FreeRTOS):-
FreeRTOS.h FreeRTOSConfig.h(your project-specific configuration)startup_ccs.c(startup file with vector table for FreeRTOS)
-
Remove the file
tm4c1294ncpdt_startup_ccs.cthat CCS created by default. Use the providedstartup_ccs.cinstead.Link the FreeRTOS kernel sources into your project (do not copy): drag-and-drop the FreeRTOS folder from your file explorer into CCS Project Explorer. In the popup:
- Choose Link to files.
- Recreate folder structure with virtual folders relative to
PROJECT_LOC. - When prompted, allow CCS to adjust include paths automatically. Check the option “Do this for all header files…”.
Do not copy these files into the project.Open
Project > Properties > ARM Linker > Basic Optionsand set C system stack size to2048.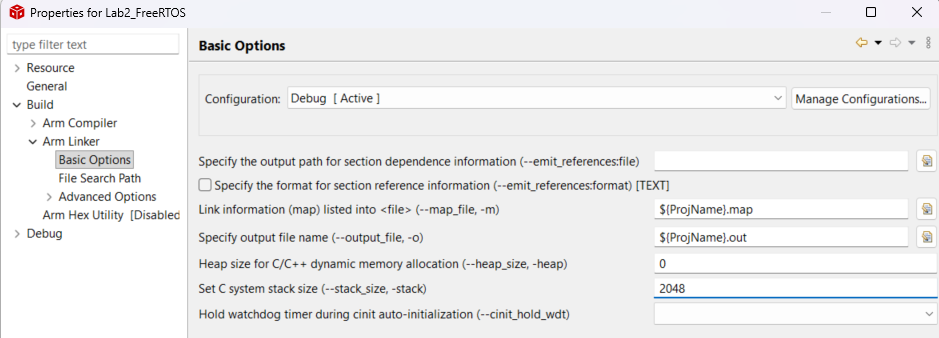
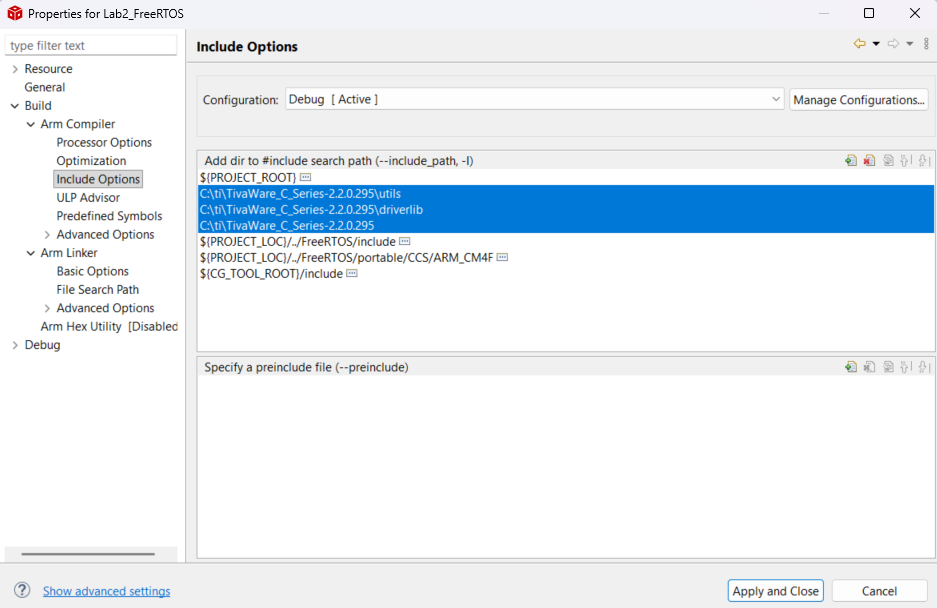
Verify include paths under
Project > Properties > Build > Compiler > Include Optionsto confirm the FreeRTOS include paths were added correctly.
Include TivaWare driverlib and utils in
Project > Properties > Build > Compiler > Include Options.- C:\ti\TivaWare_C_Series-2.2.0.295\utils
- C:\ti\TivaWare_C_Series-2.2.0.295\driverlib
- C:\ti\TivaWare_C_Series-2.2.0.295
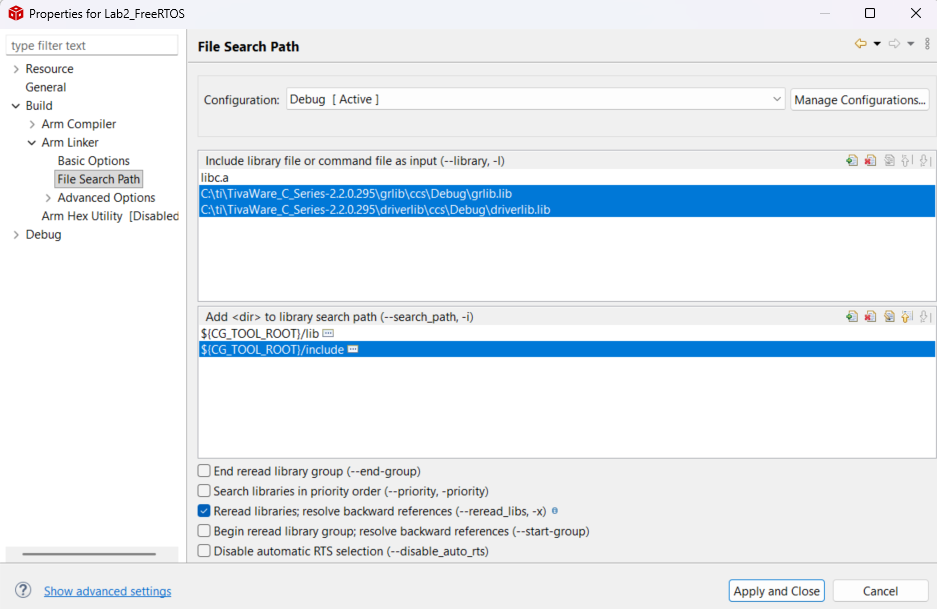
Add the pre-compiled tivaware library to
Project > Properties > Build > Linker > File Search Path:- C:\ti\TivaWare_C_Series-2.2.0.295\grlib\ccs\Debug\grlib.lib
- C:\ti\TivaWare_C_Series-2.2.0.295\driverlib\ccs\Debug\driverlib.lib
First Test Project
Section titled “First Test Project”Create a simple main.cpp (Right-click the project > New > Source File) and add the following code to verify that FreeRTOS compiles, links, and the scheduler starts correctly.
This minimal example creates a single task that toggles LED D1 (PN1) once per second. If you see the LED blinking, FreeRTOS is working. No external libraries are needed — only TivaWare driverlib and FreeRTOS.
#include <stdint.h>#include <stdbool.h>
extern "C" {#include "driverlib/fpu.h"#include "driverlib/interrupt.h"#include "driverlib/sysctl.h"#include "driverlib/gpio.h"#include "inc/hw_memmap.h"#include "FreeRTOS.h"#include "task.h"}
// A single task: blink LED D1 every 1 secondvoid HeartbeatTask(void *pvParameters) {    for (;;) {        GPIOPinWrite(GPIO_PORTN_BASE, GPIO_PIN_1, GPIO_PIN_1); // LED ON        vTaskDelay(pdMS_TO_TICKS(1000));        GPIOPinWrite(GPIO_PORTN_BASE, GPIO_PIN_1, 0);          // LED OFF        vTaskDelay(pdMS_TO_TICKS(1000));    }}
int main(void) {    IntMasterDisable();    FPUEnable();    FPULazyStackingEnable();
    SysCtlClockFreqSet(        SYSCTL_XTAL_25MHZ | SYSCTL_OSC_MAIN |        SYSCTL_USE_PLL | SYSCTL_CFG_VCO_480,        120000000    );
    // Enable GPIO Port N and configure PN1 (LED D1) as output    SysCtlPeripheralEnable(SYSCTL_PERIPH_GPION);    while (!SysCtlPeripheralReady(SYSCTL_PERIPH_GPION)) {}    GPIOPinTypeGPIOOutput(GPIO_PORTN_BASE, GPIO_PIN_1);
    IntMasterEnable();
    // Create a single task — just enough to prove the scheduler works    xTaskCreate(HeartbeatTask, "HB", 128, NULL, 1, NULL);
    // Start scheduler (never returns)    vTaskStartScheduler();
    while (1);}
Compile and flash the project to your EK-TM4C1294XL board. You should see LED D1 blinking every second. This confirms:
- The project compiles and links with FreeRTOS
- The scheduler starts successfully
vTaskDelay()works (the LED toggles at a steady 1-second rate)